Residential roofing installation in Midwest Region, MO starts long before a crew shows up with a dumpster and a boom truck — it starts with the right material, a cleared permit, and a contractor who can walk you through every stage without dodging questions. This guide breaks down what a proper re-roof actually looks like, step by step, so you can tell a quality install from a rushed one before you sign anything.
Roofing Material Options for Midwest Region, MO Homes
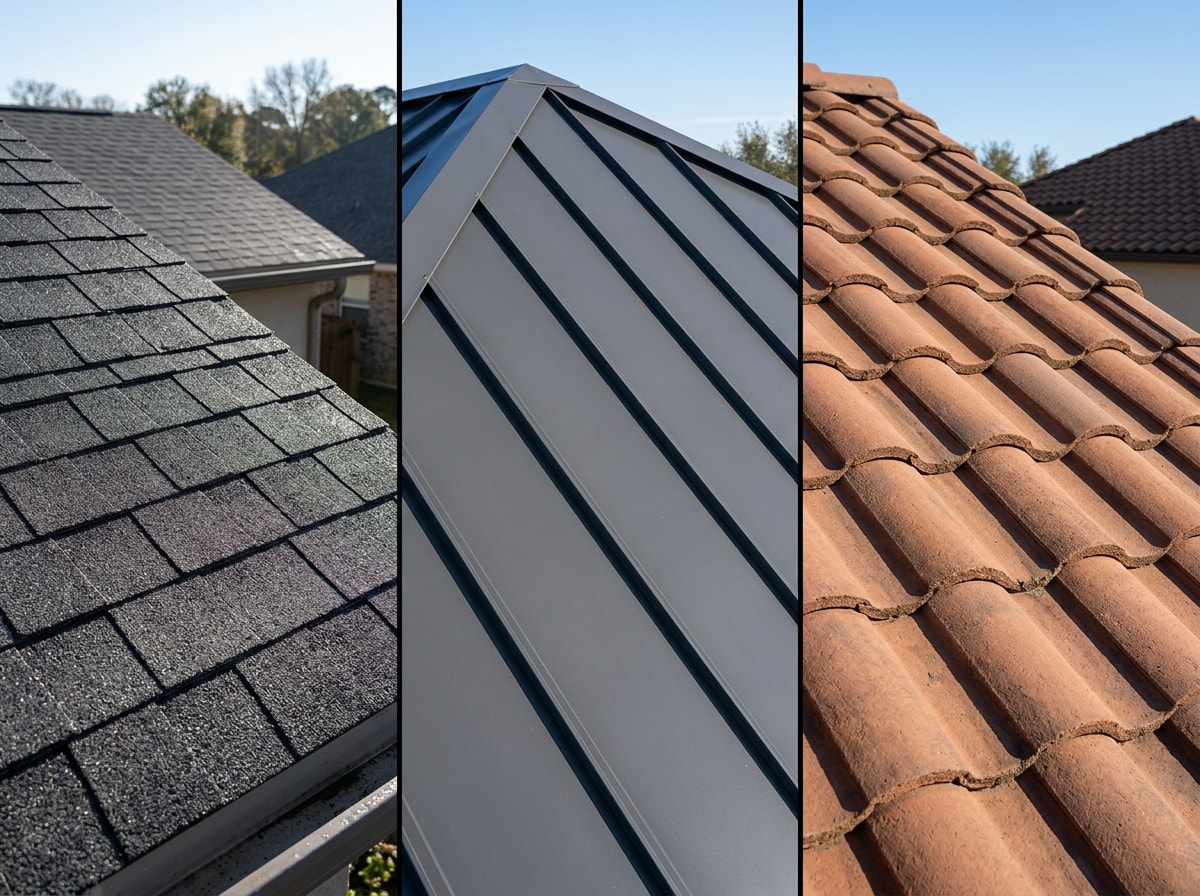
Most homeowners in this region choose between asphalt shingles, metal, or tile/composite. Each trades off differently on install cost, labor, and how long it holds up against Missouri's hail, wind, and freeze-thaw cycles.
| Material | Relative Install Cost | Typical Lifespan | Hail/Wind Performance | Best For |
|---|---|---|---|---|
| Asphalt shingles (architectural) | $ | 20–30 years | Good; Class 4 impact-rated options available | Most homes, budget-conscious owners |
| Metal panels/shingles | $$$ | 40–70 years | Excellent | Hail-prone areas, long-term owners |
| Tile / composite | $$–$$$ | 50+ years | Very good, but heavy | Homes with reinforced roof decking |
Architectural asphalt shingles remain the most common residential choice in Missouri because they balance cost, durability, and curb appeal well. Metal costs more upfront and needs specialized labor, but it holds up better against the hail and wind this region sees regularly. Tile and composite last just as long, though not every roof deck can support the added weight without reinforcement first.
A contractor who's doing this right will walk you through all three before recommending one — not just push whatever they happen to stock. Asphalt shingles' fire resistances are categorized by Class A, B or C, with Class A signifying the most fire-resistant , and NRCA recommends shingles that comply with ASTM D3462, though not all asphalt shingles comply with this standard — worth asking about before you buy. For a closer look at materials built to last through Missouri winters and summers, see our long-lasting roofing material guide for the Midwest Region. For installation-specific services, check the residential roof repair page or the broader roofing contractor services overview.
Before Installation: Permits, Codes, and Inspections
Everything between signing a contract and the crew arriving falls into this phase: a detailed consultation, locking in material and color, and clearing the permit hurdle before tear-off starts.
Missouri has no single statewide roofing code — each city and county decides whether to adopt the International Residential Code (IRC) and how strictly to enforce it. That means permit rules can look completely different ten miles apart.
| Jurisdiction Type | Permit Typically Required For | Code Basis |
|---|---|---|
| Major metros (Kansas City, St. Louis) | Nearly all re-roofing work | Locally amended IRC/IBC |
| Mid-size cities (Springfield, Columbia, Jefferson City) | Full tear-off and replacement; repair thresholds vary | IRC, often 2015 or 2018 edition |
| Rural/unincorporated counties | Often minimal or no permit requirement | Code adoption varies by county |
Always confirm current fees and permit thresholds with your local building department — they change, and this table is a starting point, not a substitute for a phone call. St. Louis County, for example, publishes its own re-roofing checklist spelling out exactly what triggers a permit for asphalt shingle work. Nationally, Chapter 9 of the IRC addresses roof covering materials including asphalt shingles, clay and concrete tile, metal roof shingles, and metal roof panels , and provides the requirement for wind resistance of roof coverings that local departments then adapt. You can review the full IRC Chapter 9 text if you want the baseline your contractor should already know cold.
Skipping a required permit can void your manufacturer warranty and create real headaches at resale. Check our Midwest Region, MO area page to see which municipalities our crews already have working relationships with.
Residential Roofing Installation Process, Step by Step
Installation day transforms your property for a short stretch — materials dropped off, old shingles stripped, new ones going down. Knowing the sequence helps you plan around the noise and the dumpster in the driveway.
- Material delivery and site prep. Shingles and underlayment typically arrive 1–2 days ahead and get loaded directly onto the roof by boom truck, so the crew starts working immediately instead of hauling bundles by hand.
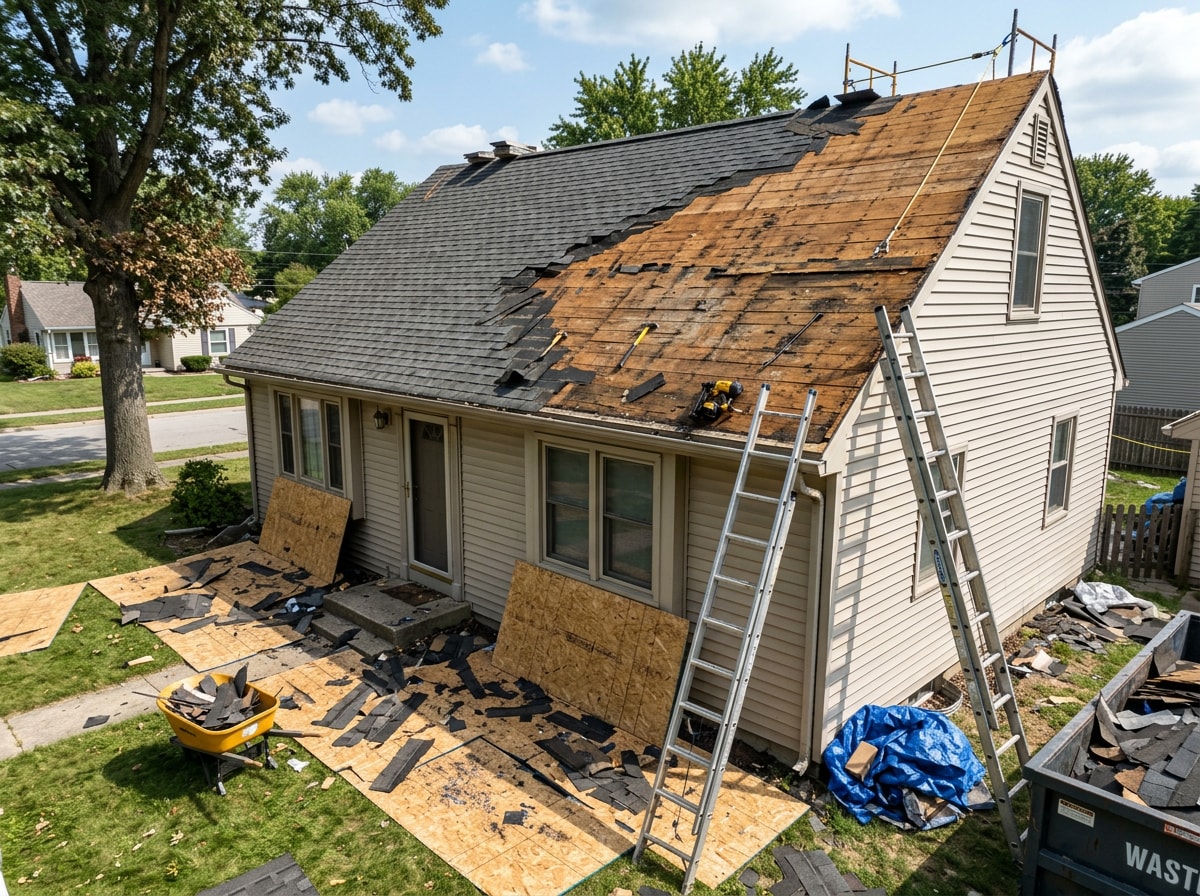
- Tarp and protect the property. Tarps or OSB sheets go down to shield the lawn, siding, and windows from falling debris before tear-off begins.
- Tear-off and deck inspection. Old shingles come off down to the deck, which gets checked for rot, soft spots, or fastener failure before anything new goes on.
- Underlayment and flashing. New underlayment goes down first, followed by flashing around chimneys, vents, and valleys to keep water out at the most vulnerable joints.
- Field shingle installation. The bulk of the roof gets covered in the main field shingles, working from eave to ridge.
- Hip and ridge installation. Specially shaped ridge shingles cap the hips and peak, often paired with a ridge vent for attic airflow.
- Final inspection and cleanup. The crew walks the whole roof, checks every seal, and does a full sweep of the yard before calling it done.
On underlayment specifically, there's a detail worth asking your contractor about directly: NRCA recommends a single layer of No. 15 asphalt-saturated underlayment for roofs with slopes of 18 degrees or greater, and a minimum of two layers for slopes between 14 and 18 degrees . Crews we work with across the Midwest Region routinely find a roof deck with hidden rot under two or three old layers of shingles — something a drive-by estimate never catches, which is exactly why the deck inspection step matters as much as the shingles themselves.
Given how often this region sees hail, it's worth asking how your shingle choice measures up. Shingles seeking the optional Hail Supplement must be rated Good or Excellent on the IBHS Hail Impact-Resistant Shingle Ratings, which outperform typical Class 4 shingles when tested against realistic hailstones . You can check specific product ratings on the FORTIFIED Home roof cover standards page before you commit to a brand.
After Installation: Final Inspection, Cleanup, and Warranty
Once the last shingle is nailed, a real final inspection checks that the work meets manufacturer specs and local code — not just that it looks finished from the driveway. A reputable crew walks the entire roof surface, checks flashing seals, and verifies ventilation before signing off.
Cleanup matters just as much as the install. Beyond hauling off old shingles and wrappers, crews should run a magnetic sweep across the yard and driveway to pull up stray nails. Before you sign anything, get your workmanship warranty in writing, separate from the manufacturer's material warranty, with specifics on what labor issues are actually covered.
If repairs make more sense than a full tear-off for your situation, the residential roof repair page covers that process, and the roof inspection service is a good first step either way. Once the new roof is in, a roof maintenance program helps you get the full lifespan out of it instead of waiting for the next storm to find problems.
Getting Started: What a Free Estimate Should Include
Cutting through all the stage-by-stage detail, a solid estimate process comes down to three things. First, a roof inspection with digital documentation of your current roof's actual condition, not a guess from the ground. Second, a clear plan that covers material options and, if storm damage is involved, help filing the insurance claim. Third, an installation quote with cleanup included upfront, not billed later as an add-on.
That's a useful gut-check when comparing contractors: any process missing one of those three pieces is worth a second look. See examples of completed work on our projects page to start exploring services in your area.
Ready to see where your roof stands? Request a free estimate and we'll walk the roof with you before recommending anything.
FAQ
Do I need a permit to replace my roof in Missouri?
In nearly every incorporated city or county that has adopted a building code, yes — full tear-off and re-roof work requires a permit. Minor repairs covering just a few squares may be exempt, but that threshold varies by jurisdiction. Confirm with your local building department before work starts.
How long does a residential roofing installation take in Midwest Region, MO?
A typical replacement takes 2–7 days depending on scope, weather, and crew availability. A straightforward asphalt shingle job on a single-story home usually finishes on the faster end; steep pitches, larger homes, or metal roofing push toward the longer end.
What is the best roofing material for Missouri weather?
Architectural asphalt shingles are the most common choice because they balance cost, durability, and curb appeal across most of the state. In hail-prone pockets of the Midwest Region, metal or IBHS-rated impact-resistant shingles are worth the extra upfront cost.
What happens during a roof installation, in order?
Inspection, material selection, permitting, site prep, tear-off, deck inspection, underlayment and flashing, field shingle installation, hip and ridge work, final inspection, cleanup, and a warranty review. If your roof needs repair rather than full replacement, that's a separate, usually faster process — our residential roof repair page covers it.
Does a new roof need a workmanship warranty separate from the shingle warranty?
Yes. The manufacturer's warranty covers material defects only. A separate workmanship warranty, in writing, covers labor issues like flashing leaks or improper nailing — ask for the specific terms before you sign.